Maintaining a lawn mower might not be the most glamorous part of homeownership, but it’s one of those behind-the-scenes tasks that pays off in a big way. A lush, green lawn doesn’t just happen—it takes regular care, and the tools you use need to be just as well-maintained. While most people focus on obvious upkeep like changing the oil, checking the air filter, or keeping the fuel tank topped off, one critical aspect is often ignored: sharpening the blades. It’s easy to overlook, but the difference sharp blades make is like night and day. Dull blades don’t slice through grass; they rip it. This leaves behind uneven cuts and frayed edges that turn brown quickly, making your yard look tired and patchy. More importantly, torn grass becomes vulnerable to pests and diseases, which can spread quickly and undo all your hard work. That’s why sharpening your mower blades is key to achieving a healthy, eye-catching lawn.
Growing up, I didn’t give this much thought until my grandpa shared a simple, ingenious trick that had been passed down through our family. It wasn’t some high-tech tool or expensive gadget. It was a clever, no-fuss method that required only a few basic materials—most of which you probably already have in your garage. I remember watching him one summer afternoon, working on his mower with the same calm confidence he always had when fixing things. He didn’t struggle or take hours fiddling with complicated tools. In about 15 minutes, he turned a dull, clunky blade into a precise cutting tool—like a barber sharpening a straight razor. He explained the process as we went, and since then, it’s become my go-to method.
Here’s what you need: a strip of sandpaper, a can of WD-40 or another household lubricant, a socket wrench set that fits your mower, and a small wooden block. That’s it. No power grinders, no trips to the hardware store, and definitely no professional services. What makes this method so great is its simplicity. These items work together in such a seamless way that it almost feels like a cheat code for lawn mower maintenance.
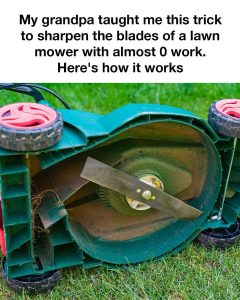
The steps are straightforward, but following them correctly ensures the best results. First, tip your lawn mower onto its side. This part is crucial—make sure the air filter and carburetor are facing upward to avoid any fuel leakage. Then, using the socket wrench, carefully remove the blade. You’ll want to wear thick gloves for this part to protect your hands. Once the blade is off, lightly spray the sandpaper with WD-40 and lay it flat on the wooden block. Hold the blade at the proper angle and gently run it across the sandpaper in smooth, even strokes. You’ll start to see the edge take on a new shine, and within a few minutes, it’ll be sharpened and ready to reinstall. Just secure it back onto the mower with the wrench, and you’re done. The whole thing takes less than 20 minutes, even for beginners.
Of course, safety should always be top of mind. Make sure the lawn mower is completely powered off and disconnected—either unplugged or the spark plug wire removed—before doing any work on it. Wear gloves to avoid cuts, and don’t rush. A steady, careful approach minimizes risk and leads to better results anyway.
Now, why does this matter so much? For starters, sharp blades reduce the workload on your mower’s engine. The cleaner the cut, the less effort the motor has to make, which can significantly extend its life and save you money on repairs. You’ll also notice that mowing takes less time and feels easier—your machine will glide through the grass instead of dragging and snagging. Best of all, your lawn will thank you. The grass recovers faster, grows back thicker, and looks brighter when it’s cleanly trimmed. You get that crisp, clean finish that looks like it came straight from a landscaping service.
While there are other methods for sharpening blades—like using a bench grinder, rotary tool, or taking it to a professional—those often require more experience, extra costs, or both. My grandpa’s trick gives you the same quality results with just a few items and a bit of your time. It’s especially ideal for people who prefer DIY solutions or want to avoid the hassle of scheduling appointments and driving around town.
There are a few common mistakes to avoid, though. Don’t over-sharpen the blade; it might seem like the sharper, the better, but too thin an edge can dull faster or even chip during use. Also, remember to check for balance. After sharpening, place the blade on a balancing tool or even a nail through the center hole. If one side dips lower than the other, it’s unbalanced and could cause vibration during mowing, which might damage your mower over time. Lastly, always clean the blade and the mower deck after sharpening to remove any debris and prevent rust.
Keeping up with this one small task—sharpening your lawn mower blades—can make a world of difference. It transforms mowing from a chore into something almost satisfying. When your mower runs smoothly, your grass looks better, and you know you’ve done it yourself, there’s a real sense of accomplishment. It’s like any other act of care—you’re investing in the long-term beauty and health of your home. With my grandpa’s easy method, anyone can enjoy a manicured, vibrant lawn without the stress. So the next time you notice your mower struggling or your grass looking ragged, don’t just refill the gas or blame the weather. Take a few minutes to sharpen those blades, and you’ll be amazed by the transformation. A sharp blade makes all the difference—not just in how your mower runs, but in how your whole lawn looks and feels.